
This bread hits different. It’s hands-down one of the most effortless yeast loaves you’ll ever pull off. Newbies rock it on the first try, while serious bread heads vibe with that legit artisan feel—think bold, crackly crust and a stretchy, airy interior packed with those big, rustic holes you usually only see in sourdough.
Zero kneading, barely three minutes of hands-on time, and it’s super forgiving—hard to mess up. Bake it today, then level it up with the cheesy spin tomorrow.
Next-Level Easy Yeast Bread That Just Hits Different
This white loaf goes way beyond the usual—it delivers standout results without making you grind for it. The process is super chill and forgiving, so first-timers can jump in no problem. But if you know your bread, you’ll clock those legit artisan vibes right away—wide-open crumb with those bold, rustic pockets like sourdough, that signature chew, and a deep, crackly crust that snaps on cue.
This one’s a straight-up hidden gem—you might ditch store-bought loaves for good after one run.
Here’s why it’s such a breeze:
– No kneading, no bulky mixer taking over your counter
– About three minutes of real hands-on time—no messy prep
– A Dutch oven levels it up, but you can still crush it without one
– Super flexible dough—let it rise in a couple hours or stretch it out over a few days, totally your call
– Low effort, high payoff—still delivers that legit, bakery-style finish without cutting corners
Everything you’ll want to pull off this homemade loaf…
Here’s the full lineup to build this loaf from the ground up—yeast, flour, salt, and water. That’s the whole squad, no extras needed.
Switch it up with the iconic Irish soda loaf, or roll with a no-yeast sandwich bread inspired by classic Aussie damper—both are straight-up winners.
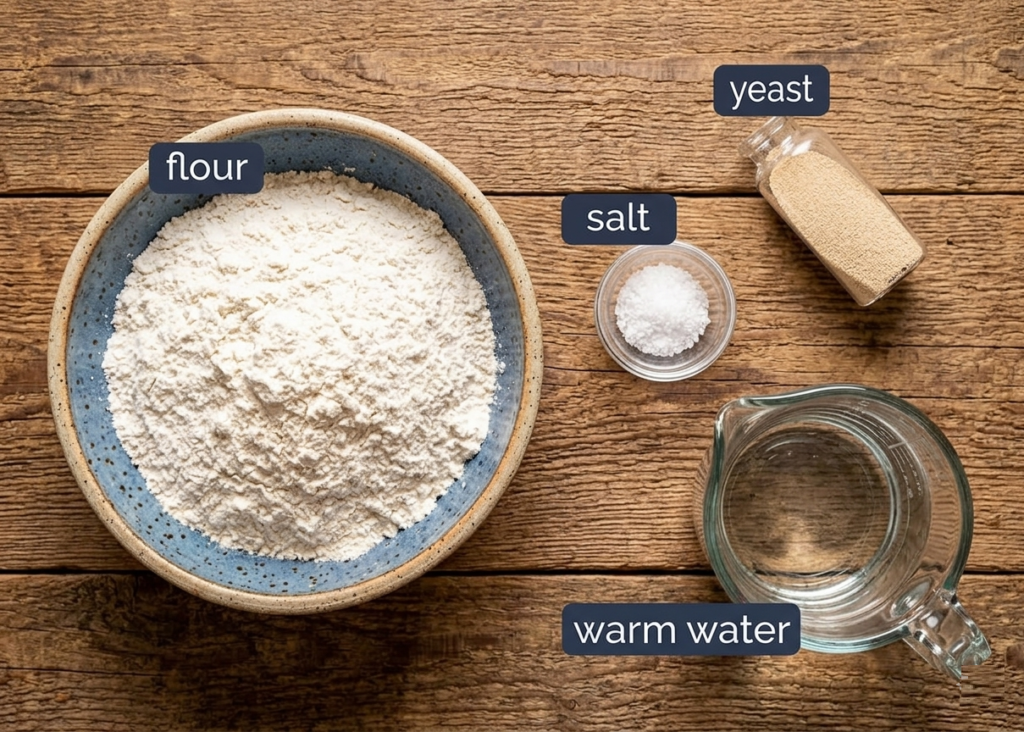
- Yeast vibes: I roll with Rapid Rise or Instant Yeast in my go-to recipe—no soaking in water, no drama. You can totally use regular yeast (aka Active Dry) too, just tweak the order a bit and dissolve it in water first. Either way, your loaf comes out just as fire.
- Flour pick: Bread flour is the MVP if you’ve got it—more protein = more gluten = dough that stretches like a champ. That means a soft-yet-chewy inside and those big, dreamy holes like your fave sourdough. But real talk? Even plain flour still makes a killer loaf—you won’t be disappointed.
Next-Level Simple Artisan Bread You Can Make at Home—No Sweat, All Flavor
Peep the step-by-step process with pro tips, and definitely check the video below—perfect for eyeballing the dough texture and getting that shaping down right.
- Mix it till the dough’s soft, tacky, and totally sticky
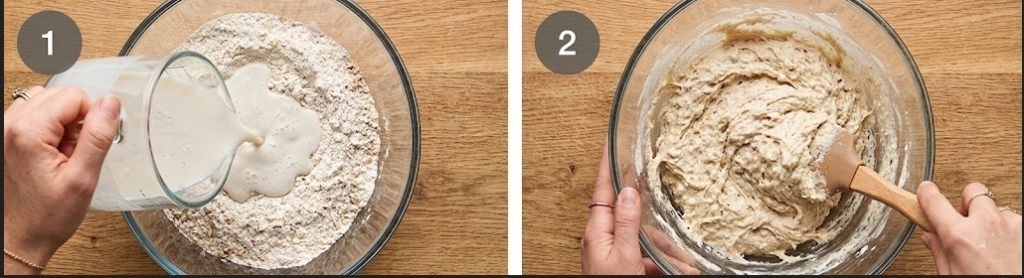
Toss the flour, salt, and yeast together, then pour in warm water and stir. Your dough’s gonna be super wet and messy—totally not kneadable—and that’s exactly the vibe we’re going for! Check the video at 17 seconds to see the perfect texture.
2. Rise!
Cover that bad boy with plastic wrap and let it chill in a warm spot (around 77–86°F) for a couple hours. Your dough’s gonna puff up big time, get all bubbly on top, and jiggle like jelly—exactly what you want. Check the video at 0:24 to see the vibe.
3. Preheat oven & pot
About 30 minutes before your dough’s ready—or while your chilled dough’s warming up—toss your Dutch oven (or cast-iron pot) in the oven and crank it to 450°F/230°C. Hot oven + hot pot = instant glow-up for your bread rise!
4. Scoop that sticky dough out of the bowl
Dump that sticky dough onto a floured surface. Yup, it’s wet and messy—and that’s totally the goal because we’re skipping kneading. Hands off, seriously.
PRO TIP: This shaping hack keeps added flour to a minimum. Less flour = wetter dough = giant air pockets, fluffy crumb, and seriously moist bread.
5. Shape the dough very roughly
Grab a dough scraper—or anything close (spatula, cake server, even a big knife)—and fold the edges in so it kinda looks like a round disc.
6. FLIP dough upside down onto paper
Slide a big piece of parchment next to your dough, then flip the whole thing over onto the paper using your scraper—seams go down, smooth side up.
Push it toward the center and give it a quick reshape into a round or slightly oval vibe.”
7. Prepare to bake!
Pull that scorching-hot pot from the oven, then use the parchment to lift the dough straight in. Slam the lid on and let the magic happen.
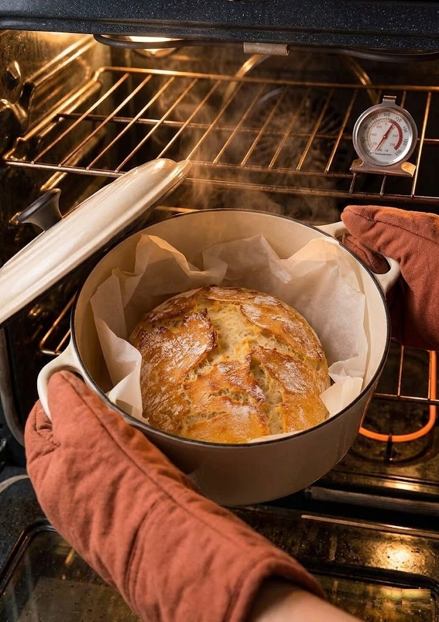
8. Bake!
Bake it 30 minutes with the lid on—this traps the steam so your bread can puff up before the crust locks in. Then drop the lid and bake another 12 minutes to get that golden-brown, crispy shell. You’ll see cracks on the surface—that’s the good stuff, giving those crunchy, rustic ridges that scream artisan-bakery vibes. 😎
Let it chill for 10 minutes before slicing. Trust me, this is key—cutting too soon leaves the middle a bit gooey. Patience isn’t easy (I’ve burned my share of loaves), but it’s worth it.
Why This Bread Works – And Pro Tips!
- Loose, sticky dough = easy rise: Soft, wet dough expands way better than stiff stuff. It’s basically doing half the work for you.
- No knead, no problem: Yeah, the dough looks rough at first, but because it’s so soft, it naturally puffs up and smooths itself out.
- Super forgiving dough: Too stiff? Splash in a bit of water. Too sloppy? Dust with flour. Not rising fast enough? Move it somewhere warmer. Whether it takes 45 minutes or 5 hours, as long as your dough matches the video and doubles in size, you’re golden—just make sure your yeast isn’t expired.
- Why a preheated Dutch oven rocks: It traps steam, giving your bread a serious rise boost before the crust sets. Big bakeries have steam ovens—your cast-iron pot is the home hack.
- No Dutch oven? No sweat: Toss hot water in a pan in the oven and bake your loaf on a tray to get that steamy effect.
- Big holes in the crumb: Less flour = looser dough, hot oven + preheated pot = max rise, and bread flour gives you those gorgeous air pockets. Using regular flour works too, but the holes won’t be as dramatic.
- In a rush? Bake immediately and it’ll still be tasty…
- Patience pays off: For next-level flavor, let the dough chill 8+ hours in the fridge. I usually mix mine in the morning (takes 3 mins!) and bake at night—or mix at night and bake in the morning (~12 hrs).
- Why fridge = flavor bomb: Cold slows the yeast down, so it stops over-rising while enzymes turn starch into sugar. The result? Bread with way more depth and taste. Rise first, then chill, and let the magic happen.